Wednesday, 9 December 2015
My website banner
I had created this banner which consists of my business logo in the middle and on either side of it is myself and my business partner's cartoon version of ourselves. I think it looks great, I wanted to cut out the cartoon versions of us and just have the logo in the middle with the navigation tabs right beside it split in the middle, so three tabs will be on right side of the logo and another three tabs will be on the left side of the logo but I changed my mind because that would look too bland and the caricatures give character to the banner.
I think this makes the website look more aesthetically pleasing and modern which is what our business is all about. When your targeting young people, your website has to reflect them. After asking the opinions of my class mates because they are in the age range I want to target for my business, they approved of it and said it looked cool and modern. To learn how to crop/cut an image in Photoshop, I used a tutorial on YouTube and looked at plenty websites on google which made the process very simple.
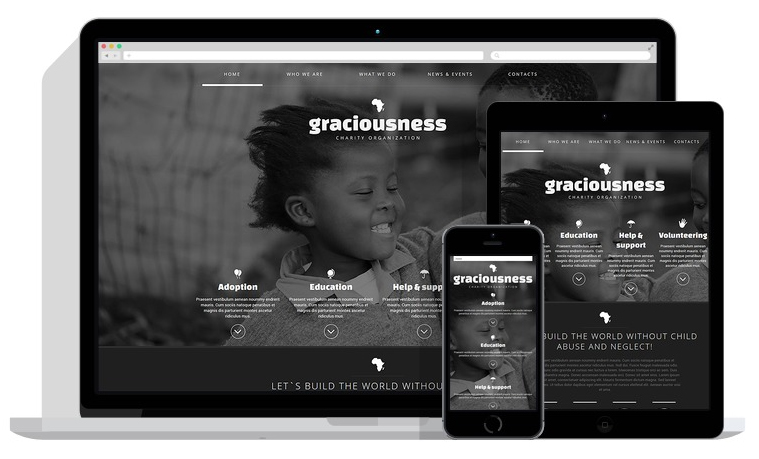
I was experiencing some difficulty on Dreamweaver because I made the above banner with the right specifications I was given in the workshop, when changing the banner size, it affected the look of it so when trying to upload the new version of the banner (the cropped version) it didn't fit and looked odd. I have now fixed the problem by going back and changing the specifications to the same ones of the first banner and it worked.
The first basic coding I have learned
https://www.codecademy.com/en/tracks/htmlcss
Code Academy has really helped me when I get stuck coding, I have done the basic lessons/tutorials which helped me go back and make sure what I had done was right in Dreamweaver. This website is very handy for practicing as they get you to repeat simple coding and show you the outcome which really helps with someone like me who prefers interactive learning instead of just copy and paste which really doesn't teach you much apart from just giving you a quick fix. If I want to do some coding after university, I will remember what this site has taught me with its easy and quick tutorials which are free. I have already recommended this site to some of my class mates that are having trouble coding too!

Code Academy has really helped me when I get stuck coding, I have done the basic lessons/tutorials which helped me go back and make sure what I had done was right in Dreamweaver. This website is very handy for practicing as they get you to repeat simple coding and show you the outcome which really helps with someone like me who prefers interactive learning instead of just copy and paste which really doesn't teach you much apart from just giving you a quick fix. If I want to do some coding after university, I will remember what this site has taught me with its easy and quick tutorials which are free. I have already recommended this site to some of my class mates that are having trouble coding too!

Changing the font in Dreamweaver
This is the first tutorial I watched when I encountered a problem when I was trying to change the font of my navigation tabs. I had found a font I really liked on Microsoft word and tried to used the name of it to insert it within the coding but I while was doing my research into why this was not working, I found out that when changing the font on Dreamweaver, you can only use the font styles that are already given to you as an option so I had to pick between those ones and just be more creative with the sizing. This tutorial was a bit long for my little problem but it did end up helping me with learning more about how to do more with design in Dreamweaver instead of sticking with the basics we are taught.
Folders and organisation
What is a site root and what does it consist of?
A site root is where all the information/images/coding/HTML and CSS etc. is kept. It is important to keep my folder as tidy as possible to avoid clutter. When I was making my website banner on Photoshop, I had a bit of difficulty with making sure that the banner was fit to the right specifications so that when I uploaded it onto Dreamweaver it would fit without any issues. I had made a banner and saved it as a JPEG image and as a PNG file, because of this, I had two of the same images on my USB and a few days later I decided to change the design of my banner so I created a whole new file. With all this work, I was forgetting that I was accumulating a lot of images on my USB outside of my site root folder which created a bit of confusion when trying to remember which image was the most recent to use on Dreamweaver. What I learned from this is that when creating something as important as a website, you need to remember to keep the device you are keeping your files on very neat and straight forward so if you encounter a problem, you can easily locate your necessary files without confusion. I have now made sure that whatever is on my USB and in my site root folder is relevant to my website and that I can easily navigate around it.

Image obtained from: https://www.google.co.uk/search?q=site+root&biw=1366&bih=584&source=lnms&tbm=isch&sa=X&ved=0ahUKEwizhK-7uM_JAhVMbT4KHW_aA40Q_AUIBigB#tbm=isch&q=website+site+root&imgrc=5iarUB_-cochDM%3A

Image obtained from: https://www.google.co.uk/search?q=site+root&biw=1366&bih=584&source=lnms&tbm=isch&sa=X&ved=0ahUKEwizhK-7uM_JAhVMbT4KHW_aA40Q_AUIBigB#tbm=isch&q=usb&imgrc=wLMQussUjUOXXM%3A
This site helped me with understanding a bit more about what a site root is and why it is needed when creating a website:
https://helpx.adobe.com/dreamweaver/how-to/first-website-part1.html
Website proposal (without website wireframe and moodboad)
My Business website proposal
Project timeline:
First phase:
The first thing I want do is to create my website banner. My website banner will include my business logo and will be in black and white and very simplistic. To make this banner I will need to use Photoshop.
Second phase:
General structure will be made on CSS with the coding practice I have had. I will be doing some more research like looking at YouTube tutorials
Third phase:
Add information, pictures and links on the website so it comes together very nicely so I can see my ideas come to life. This will also help me see if I need to change anything or move anything around especially in the navigation bars that will be at the top of the page.
Fourth phase:
Do the last checks to make sure everything is the way I want it and all the tabs work properly before I hand it in properly
Site’s purpose:
The Strive Base website's purpose is all about informing customers/consumers about the business and what services we offer. This site is going to have information regarding our events and updated media content that is posted on our YouTube channel. People will also be able to view pictures of past events in the gallery and have easy access to the YouTube channel. There will be clear links to our social media pages because we are all about young people and young people use social media more than anything on the Internet.
My images and video content to be placed on my website
I am going to be using my own images from a business event that are taken with a good quality camera and are of high resolution so that my gallery page within my website can look as clean and organised as possible while also giving off a professional feel. This is an example of how clean I want my gallery to look (excluding the background just the layout) from the popular club/restaurant Tiger Tiger website in London.
http://www.tigertiger.co.uk/london/galleries/?facebook-album-id=1233488836678029
I am using my business logo for the home page because it is the symbol for everything that is Strive Base. It is important to me for it to be placed in the middle of my navigation tabs as I really like the look of it and it stands out more. As this is a business website, information is key so I will be providing as much information as possible to my customers/consumers to make sure that they buy into my services and like/enjoy my media content.

The videos that will be placed onto my website on the media content page will be interviews recorded by myself and my business partner showcasing talented young people which is a big and important part of the business. This is one that will be placed on the site as example to show:
This is my Prezi presentation and extented mood board
http://prezi.com/b1xnqtyjfttz/?utm_campaign=share&utm_medium=copy&rc=ex0share
These are a few more examples I found after I made my first mood board as an addition for how I would love my website to look. The last two images really reflect my colour scheme and my clean cut look I am going for to look as professional as possible.
Obtained from: https://www.google.co.uk/search?q=website+wireframe&biw=1366&bih=584&source=lnms&tbm=isch&sa=X&sqi=2&ved=0ahUKEwih8ZHmhc_JAhVI1xoKHYHYDxsQ_AUIBigB#tbm=isch&q=clean+business+website&imgrc=bGb_r3opEVb5tM%3A

Obtained from: https://www.google.co.uk/search?q=website+wireframe&biw=1366&bih=584&source=lnms&tbm=isch&sa=X&sqi=2&ved=0ahUKEwih8ZHmhc_JAhVI1xoKHYHYDxsQ_AUIBigB#tbm=isch&q=black+and+white+color+scheme+on+website&imgrc=s8DtR4uN5IUwjM%3A

Obtained from: https://www.google.co.uk/search?q=website+wireframe&biw=1366&bih=584&source=lnms&tbm=isch&sa=X&sqi=2&ved=0ahUKEwih8ZHmhc_JAhVI1xoKHYHYDxsQ_AUIBigB#tbm=isch&q=black+and+white+color+scheme+on+website&imgrc=YgCn-e63_bPX_M%3A
These are a few more examples I found after I made my first mood board as an addition for how I would love my website to look. The last two images really reflect my colour scheme and my clean cut look I am going for to look as professional as possible.
Obtained from: https://www.google.co.uk/search?q=website+wireframe&biw=1366&bih=584&source=lnms&tbm=isch&sa=X&sqi=2&ved=0ahUKEwih8ZHmhc_JAhVI1xoKHYHYDxsQ_AUIBigB#tbm=isch&q=clean+business+website&imgrc=bGb_r3opEVb5tM%3AObtained from: https://www.google.co.uk/search?q=website+wireframe&biw=1366&bih=584&source=lnms&tbm=isch&sa=X&sqi=2&ved=0ahUKEwih8ZHmhc_JAhVI1xoKHYHYDxsQ_AUIBigB#tbm=isch&q=black+and+white+color+scheme+on+website&imgrc=s8DtR4uN5IUwjM%3A

Obtained from: https://www.google.co.uk/search?q=website+wireframe&biw=1366&bih=584&source=lnms&tbm=isch&sa=X&sqi=2&ved=0ahUKEwih8ZHmhc_JAhVI1xoKHYHYDxsQ_AUIBigB#tbm=isch&q=black+and+white+color+scheme+on+website&imgrc=YgCn-e63_bPX_M%3A
The wireframe and navigation on my website
A wireframe is like a skeleton for your website. The same way architects have a plan of the building that will be built, a website has to have a wireframe to show how the website will look without information/pictures etc.. on it yet.
This is a simple example of a website wireframe similar to my idea of the wireframe I want for my business website. On here you can also see clearly a navigation bar which is used to guide website visitor's around a website. I want my navigation bar to be as simple and clean like this one where people can access all my information in few simple clicks or taps:

My wireframe:
This is a simple example of a website wireframe similar to my idea of the wireframe I want for my business website. On here you can also see clearly a navigation bar which is used to guide website visitor's around a website. I want my navigation bar to be as simple and clean like this one where people can access all my information in few simple clicks or taps:

he ske
Image obtained from: https://www.google.co.uk/search?q=website+wireframe&biw=1366&bih=584&source=lnms&tbm=isch&sa=X&sqi=2&ved=0ahUKEwih8ZHmhc_JAhVI1xoKHYHYDxsQ_AUIBigB#tbm=isch&q=website+simple+wireframe&imgrc=3p9FH55901bXqM%3AMy wireframe:
Dreamweaver
What is dream weaver and how I'm I using it to help me in my project?
Dreamweaver is the text editor that I am using to code my website. The first thing I did when I discovered I would be creating a website was to research how to make a website. This brought me to many sites and I had an overload of information which was really overwhelming especially for someone like me who has never created a website before. Through my first few lectures and workshops, I was introduced to a brilliant website called Lynda.com which provides straight forward tutorials on how to navigate around Dreamweaver for first time users like myself or regular users who just want to refresh their knowledge.
http://www.lynda.com/Dreamweaver-training-tutorials/185-0.html
This is the very first video I watched to ease myself into Dreamweaver and I found it very useful because the person who made it kept in mind that their viewers where first time users. Some tutorials that can be found on YouTube are for people who have a good grip on Dreamweaver and just need specific help with a certain element.

Image from:
https://www.google.co.uk/search?q=dreamweaver&biw=1366&bih=584&source=lnms&tbm=isch&sa=X&sqi=2&ved=0ahUKEwj-y9fB-87JAhUBjxQKHYY_CvwQ_AUIBygC#tbm=isch&q=dreamweaver+2015&imgrc=UcIP8-MEoxEfJM%3A
Dreamweaver is the text editor that I am using to code my website. The first thing I did when I discovered I would be creating a website was to research how to make a website. This brought me to many sites and I had an overload of information which was really overwhelming especially for someone like me who has never created a website before. Through my first few lectures and workshops, I was introduced to a brilliant website called Lynda.com which provides straight forward tutorials on how to navigate around Dreamweaver for first time users like myself or regular users who just want to refresh their knowledge.
http://www.lynda.com/Dreamweaver-training-tutorials/185-0.html

Image from:
https://www.google.co.uk/search?q=dreamweaver&biw=1366&bih=584&source=lnms&tbm=isch&sa=X&sqi=2&ved=0ahUKEwj-y9fB-87JAhUBjxQKHYY_CvwQ_AUIBygC#tbm=isch&q=dreamweaver+2015&imgrc=UcIP8-MEoxEfJM%3A
Tuesday, 20 October 2015
My introduction to CSS and HTML
This is the simple definition of CSS that I found on the W3schools website that helped me understand what CSS is all about and its functions:
CSS is a stylesheet language that describes the presentation of an HTML (or XML) document.
CSS describes how elements must be rendered on screen, on paper, or in other media.
This is an example of what a CSS programme looks like. This programme is usually used for coding. I was able to practice this in my workshop where myself and other students used CSS to create a few simple sentences for us to become comfortable with the structure CSS has to offer so that eventually we could turn it into a HTML document.
HTML stands for hypertext markup language that is normally used to create all the webpages we use and see on the computer/internet.
CSS is a stylesheet language that describes the presentation of an HTML (or XML) document.
CSS describes how elements must be rendered on screen, on paper, or in other media.
http://www.w3schools.com/css/
HTML stands for hypertext markup language that is normally used to create all the webpages we use and see on the computer/internet.
http://www.msfusa2000.com/elearning/html-css.html
This website also helped me to understand technical terms such as HTML and others that i might hear in the lecture or seminar that i do not understand or have never heard of before: http://techterms.com/definition/html
Subscribe to:
Comments (Atom)


